


No Models, No Mess: Just Image Labels
Apple Makes Image Classification a Two-Minute Task

Image classification is significantly less painful, just got much easier.
With Apple’s new ClassifyImageRequest in the Vision framework, image labeling is now almost effortless.
You don’t need a custom Core ML model.
You don’t need to train anything.
You don’t even need to touch third-party tools.
It’s all built in - and it’s fast.
Let’s go through the basic ideas.
Why this is important?
When adding image classification to your iOS application, it would require hours of model wrangling: locating datasets, converting Core ML models, laboring over imports, and inflating the size of your application for a feature that most of your users would barely notice.
If you’ve ever attempted to “just classify an image” in Swift - no doubt, you’ve faced at least one of these:
Out-of-date tutorials that won’t work with new (or even old) frameworks.
Official documentation that ends at “Hello, World.”
An abundance of sample code that skips error handling and real-world needs.
That has all changed with Xcode 16 and iOS 18.
Apple now ships a production-ready classifier as part of the OS.
No Core ML model required, no bloat in your application bundle, and no hidden costs.
You just call the API and receive results.
The only catch: it doesn’t run in the simulator (you need a real device).
But if you're building for users, you’re going to want/need to test on real hardware anyway.
The core usage
Let’s walkthrough it. Say you have an image. It could be straight from the camera, from your photo library, or downloaded from the internet. Here is the basic pattern:

What is happening here?
You create a request.
You perform it on your image (could be a URL, CGImage,CIImage ,CVPixelBuffer, CMSampleBuffer or raw Data).
You get back an array of ClassificationObservation objects.
You can filter results based on either precision or recall to manage false positives and confidence.
Results look like this:
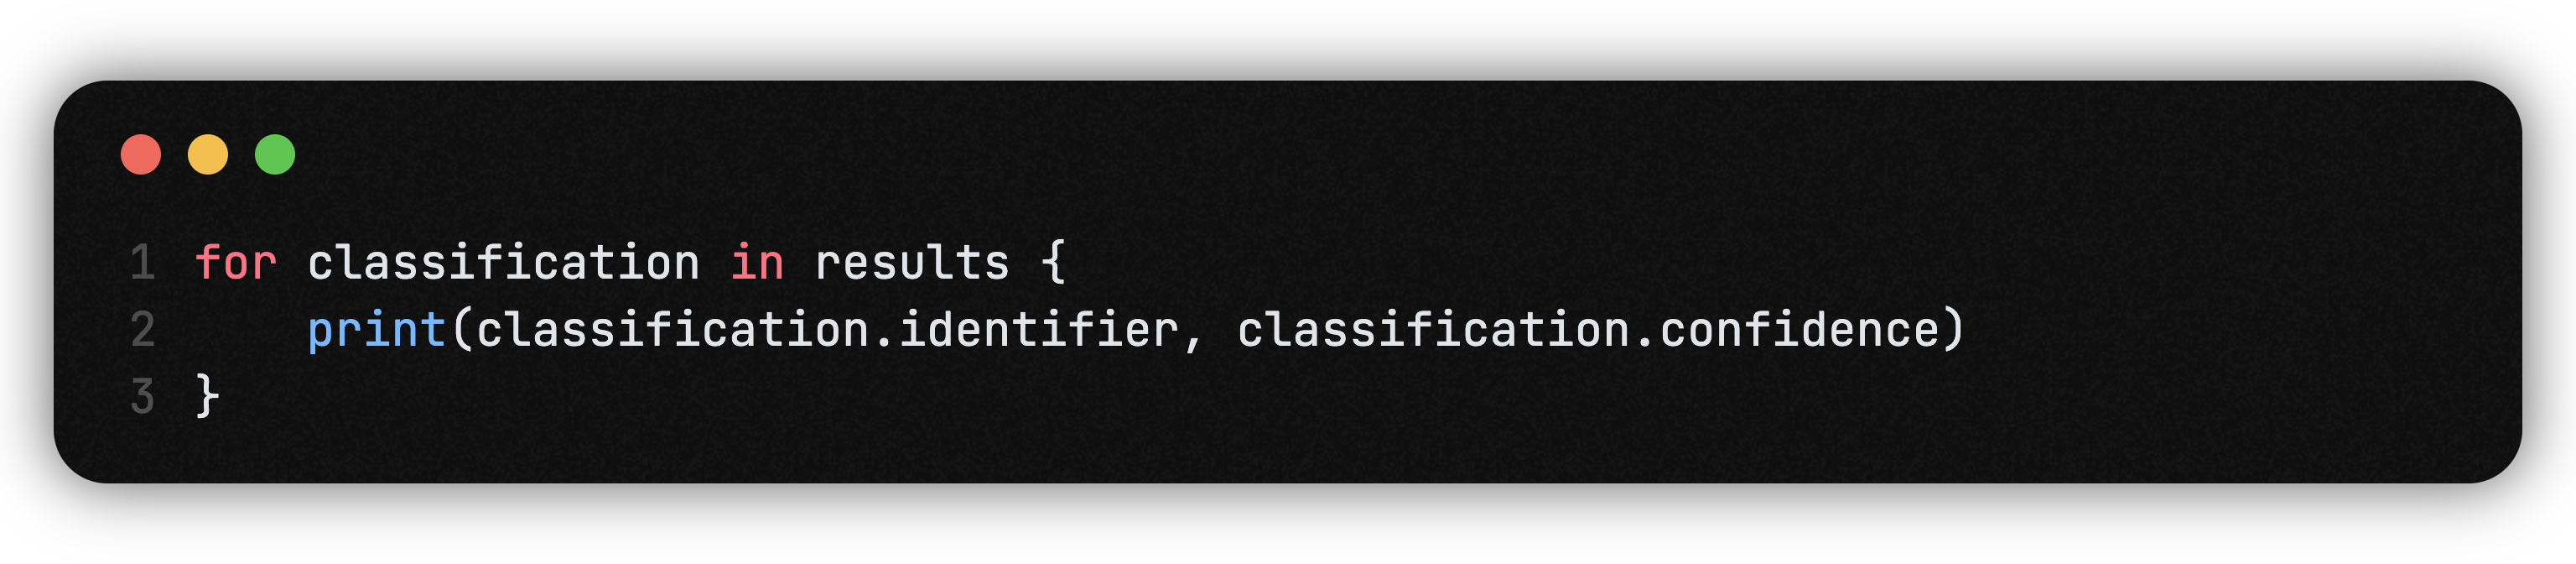
identifier: The detected category (e.g., “cat,” “laptop,” “pizza”).
confidence: A float between 0 and 1, higher means more certain.
You can store these values, use them to update your UI, feed them into other workflows (like search or recommendations).
Real world flexibility
Where does this API shine the most?
Speed: Classification is nearly instant. You get your labels back quickly with no round trips or models to download.
Flexibility: Pass in images off any form you have them. File URL, in-memory buffer, or raw data blob – all work the same.
Zero setup: There’s no Core ML imports, no Info.plist changes, no model management.
Always latest: You’re using Apple’s own on-device model. Improvements will show up in OS updates, your app will just get smarter for free.
Filtering results for quality
Not every prediction is perfect. Apple provides you with two filtering methods:
Minimum precision for high recall:
hasMinimumPrecision(threshold, forRecall: targetRecall)
“Give me all results where the classifier is at least X% sure, I want as many true positives as I can get.”
Minimum recall for high precision:
hasMinimumRecall(threshold, forPrecision: targetPrecision)
“Only show me results that are virtually never wrong, even if I get fewer results.”
You can use either depending on your application. For consumer photo apps, you should lean on recall (show users more options, let them confirm). For fully automated pipelines, really crank the precision.
Error handling and gotchas
Simulator won’t work: You have to run on device or if you forget, then you’ll just get empty results.
iOS 18+: This is cutting-edge stuff. If you have to support old devices, you’re gonna have to have a fallback.
Model coverage: Apple’s model is general-purpose, not hyper-specialized. If you need to classify rare mushrooms, you will still need a custom model.
Integrating with a real app
One common use case, tagging images before upload to a server, showing users smart labels, or automating organization of content.
A minimal working example:

That is it. Super simple. No boilerplate.
When should you use this?
You want fast reliable labels from generic images.
You don’t want to maintain models or bloat your app.
You want to stop wasting time maintaining infrastructure and to focus on features that your users will notice—not plumbing.
If you are someone that needs domain knowledge or custom categories, you could use Core ML as a fallback in those special cases.
The bottom line
Apple’s new ClassifyImageRequest takes the pain out of image classification in Swift. Less setup, fewer moving parts and instant on-device results—for free.
If you have changed your mind about chasing down scattered blog posts and sample code, just use this API, and ship.
Now you can spend less time on infrastructure and more time building things that really matter.
Want more hands on, project-based AI and SwiftUI guides like this—without all the noise? Stay tuned. We have just started.