


How to Detect Image Contours in SwiftUI with Vision
Skip the guesswork—use Vision to highlight what matters in your images

So you want to bring AI image processing into SwiftUI? Vision's DetectContoursRequest should definitely be on your radar!
If you have ever attempted to bring a little bit of "intelligence" to your iOS apps – automatic detection of subjects in a photo, outlining, or marking specific areas, you will save yourself hours of work researching and trial and error with this API.
Apple's documentation for Vision has a reputation for being short. You can then figure everything else out as you go along.
The good news is once you know a few things, contour detection is not necessarily difficult to implement.
Let's make this easy to digest – when to use DetectContoursRequest, how every code block works, and the things you probably want to avoid whilst developing in the real world.
Why contour detection is useful
Contour detection fits a lot of use cases in iOS. Here are a few of the most useful:
Automatic outlining for photos or graphics, which makes art filters look tremendous
Segmentation and subject selection, allowing images to be modified or beautified at the touch of a button
Background removal – pair with other algorithms for AI driven background swaps or bokeh effects
Smart scanning – detecting document, ticket, ID edges for cropping, or once detected, recognizing the type of document
All of these use cases share one thing in common: they all require "contours", i.e. the boundaries between foreground and foreground objects.
Previously you would write a confusing set of edge-detection code leveraging OpenCV or using Core Image. However, Vision provides a comprehensive and native interface; life gets easier!
Code walkthrough: from soup to nuts
Let’s look at a complete SwiftUI implementation before breaking it all down into pieces:
@preconcurrency import SwiftUI
import Vision
struct ContoursShape: Shape {
var contours: CGPath?
func path(in rect: CGRect) -> Path {
var path = Path()
if let contours = contours {
let transform = CGAffineTransform(
scaleX: rect.width, y: rect.height
)
path.addPath(Path(contours), transform: transform)
}
return path
}
}
struct ContourDetectionView: View {
@State private var contours: CGPath? = nil
var body: some View {
VStack {
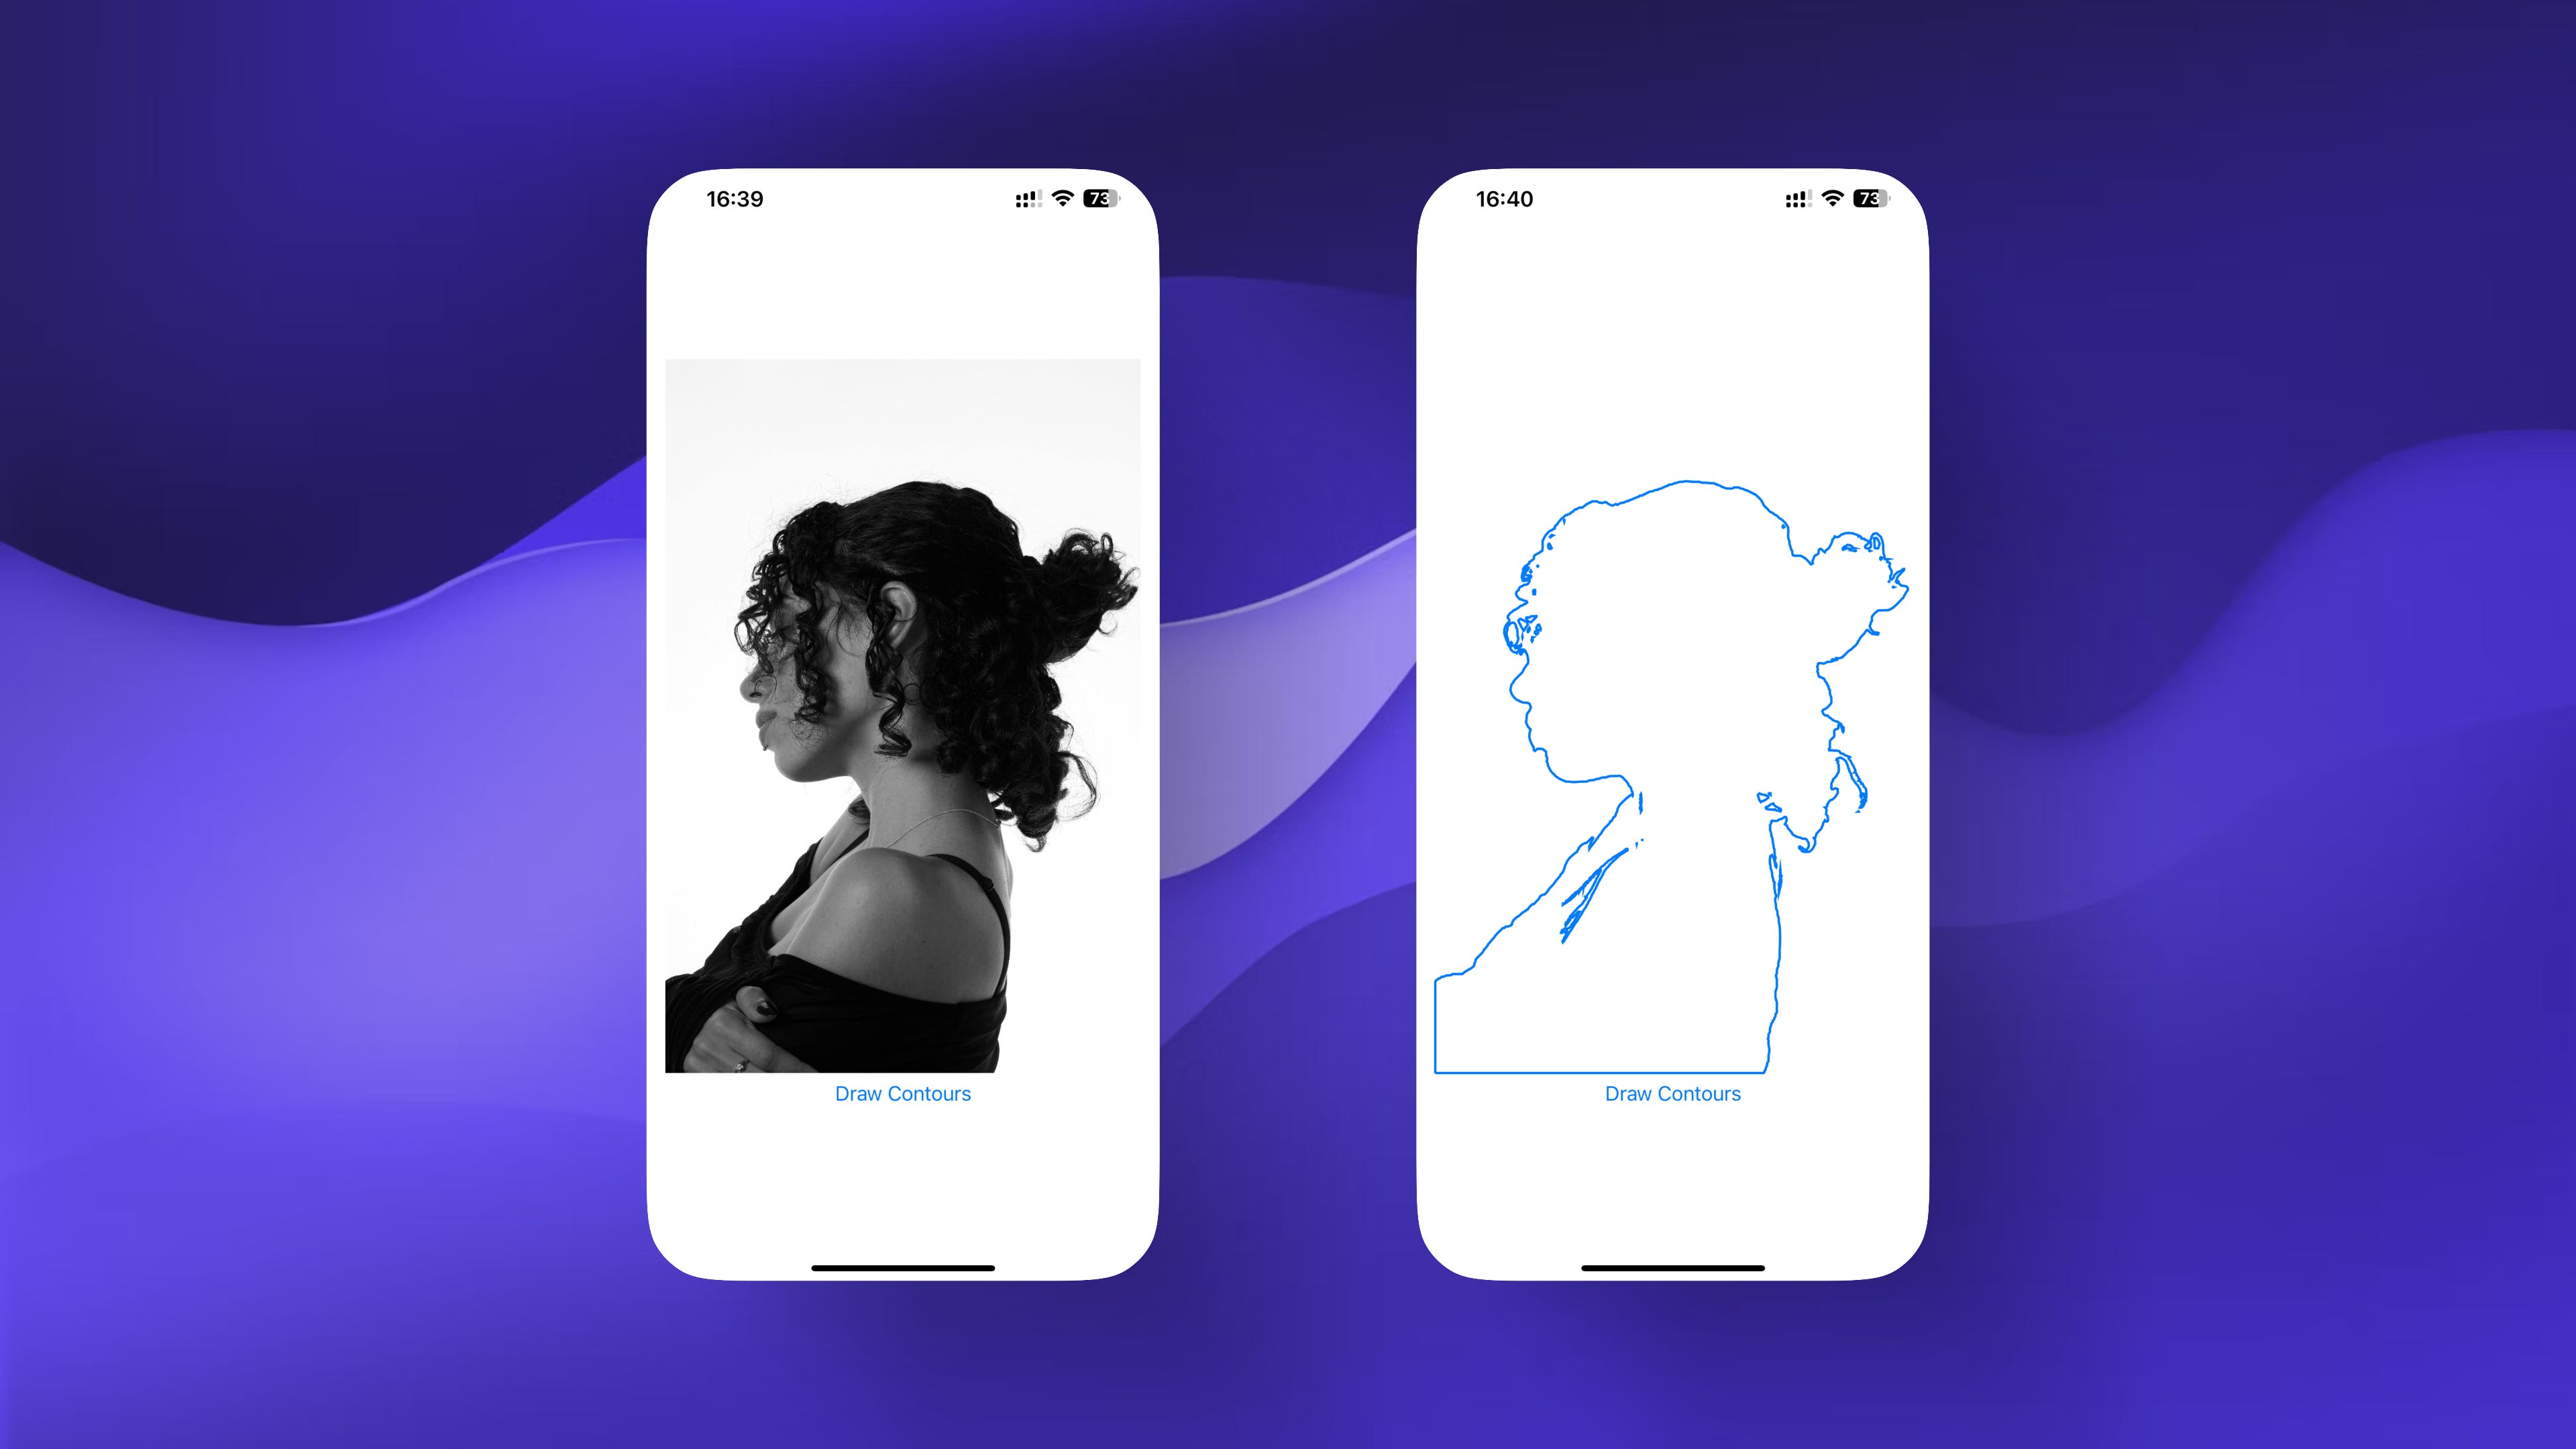
Image("girl")
.resizable()
.aspectRatio(contentMode: .fit)
.opacity(contours == nil ? 1 : 0)
.overlay(
ContoursShape(contours: contours)
.stroke(Color.blue, lineWidth: 2)
)
Button {
self.drawContours()
} label: {
Text("Draw Contours")
}
}
.padding()
}
private func drawContours() {
Task {
do {
contours = try await detectContours(image: UIImage(named: "girl")!)
} catch {
print("Error detecting contours: \(error)")
}
}
}
private func detectContours(image: UIImage) async throws -> CGPath? {
// Image to be used
guard let image = CIImage(image: image) else {
return nil
}
// Set up the detect contours request
var request = DetectContoursRequest()
request.contrastAdjustment = 2
request.contrastPivot = 0.5
// Perform the detect contours request
let contoursObservations = try await request.perform(
on: image,
orientation: .downMirrored
)
// An array of all detected contours as a path object
let contours = contoursObservations.normalizedPath
return contours
}
}What does Vision’s DetectContoursRequest do?
At the core of this is Vision’s DetectContoursRequest. This object is explicitly designed to extract boundaries from an image—and you can customize the results to fit your application needs:
DetectContoursRequest is the workhorse of contour detection in Vision. Each time you instantiate it there is edge extraction going on.
contrastAdjustment dictates how much contrast Vision will boost before searching for edges. Increasing values will catch more edges (too many at times). Use the slider to dial in what works.
contrastPivot dictates what the midpoint for contrast boosting is. Usually the default of 0.5 works fine, but if you see strange things happening on troublesome images then consider changing this.
perform is asynchronous, so you must await the result. This allows you to keep your UI responsive.
And the result? normalizedPath is a CGPath whose coordinates all live in the 0-1 range. (That’s what “normalized” means here.)
Don't overlook the orientation parameter. SwiftUI and Vision sometimes don't agree on the orientation of the image, especially when an image was edited or captured using a front-facing camera. If your outlines seem to be misaligned, orientation is usually the culprit. .downMirrored is often what many front-facing camera selfies or default UIImage orientations use, but you could do .up, .right or .left for other cases too. If things don’t line up, try them all.
Drawing with SwiftUI - details worth noting
Vision provides you with a CGPath, but SwiftUI's Shape protocol only wants a Path, so to line up your detected contours right on top of the image, you need to scale those 0-1 coordinates up to their view size:

Vision's path is normalized: the coordinates run from 0 to 1, while your image could be any size. That transform gets everything lined up so your overlay doesn't float off in the wrong position.
ContoursShape conforms to Shape, so every UI update invokes a redraw of the contours. Using overlay puts your contours right on top of the photo.
Common pitfalls and debugging advice
A few lessons learned from building with this in the wild:
Vision's DetectContoursRequest only accepts a CIImage. If you have a UIImage, convert it first.
The result is always normalized. Always scale your image to fit your view, or else things won't line up.
contrastAdjustment has a huge influence to what is detected. If the image is cluttered, try higher numbers; if the background is simple, lower values may work better.
It is easy to forget to specify the orientation. If your contours aren't matching your photo, cycle through them.
Some images produce way too many contours. If you want a cleaner look, consider filtering out everything but the largest contour path.
Who should use this?
If you are new to SwiftUI or looking to infuse some AI potion into your app, consider using Vision's contour detection. It's an Apple-native API, so it is performant and seamless to implement. And if you care about building stuff quickly or prototyping, there is no need to re-invent the wheel.
This code unpacking should save you hours of searching and trial and error. Every project and image set is a bit different, so use this as a jumping off point and play with each of the parameters to navigate toward what works best for your use case.
If you experience issues—misaligned contours, wacky image scaling, headaches over parameters—feel free to reach out and share your experience. Vision also has support for more advanced features: CoreML integration, video frame analysis, and higher-level image understanding. If you want to keep sharp-ing your skills, there is plenty more to explore.
I hope this hands-on, practical guide gives you an indication of the possibilities of combining Vision with SwiftUI to do contour detection. If you'd like to share questions or insights from your own tests, please do. The more we stretch our use of Vision, the brighter our apps become.